Guide to host a website on Hostgator: Planning to run a website and not familiar with any programming languages? Well, now you can create your own website without knowing any technical or programming knowledge. These days, to have your own website is just a one click away. All you need to have a
- domain name (name of your website) and
- a web space (to keep files, images of your website).
The next question is, where to buy domain name and a web space? These days there are tons of websites (or service provider), from where you can buy domain name and web space. Even Hostgator is one of them, than Why I recommend you to get the services from Hostgator. Here are the reasons,
Top reasons to get web hosting from Hostgator
- Round the clock support
- Unlimited storage
- 99.9% uptime
- Unlimited (professional) email addresses (with Unlimited Autoresponders, Mail Forwards, Email Aliases, Mailing Lists, etc.)
- 1-click installation (WordPress, Joomla, Magento, Drupal, phpBB, Gallery and many other CMSs)
- Latest cPanel
How to buy and which plan is suitable for your website
Hostgator gives you an option to buy web hosting as per your need or requirements.
Unlike static HTML sites which can be hosted on most web servers, when it comes to web applications, there are basically two types of hosting platforms. Depending on your hosting needs and what you’re most comfortable with, you can choose from:
- Linux Hosting, which allows running scripts written in PHP, Perl, Python and other Unix-originated languages, and usually supports PostgreSQL and MySQL databases. This is the most commonly used system today.
- Windows Hosting, which allows running ASP scripts utilizing .NET and other Microsoft technologies, and supports Microsoft SQL Server and Access database.
Select Your Web Hosting Plan
Click here to open Hostgator website and to get the best offers
You will typically find a wide range of services in web hosting, such as:
- Shared Hosting (best for newbie): In shared hosting, you get to share the physical server with other website owners. However, you will have your own separate account (secured with login credentials). Shared hosting is very affordable because the cost of operating the server is shared between you and the other website owners.
- VPS Hosting (Virtual Private Server Hosting): In VPS hosting, every website is stored on a very powerful server that is divided into several virtual compartments. The server software is configured separately so that each unit can function independently. It should be your preferred option if you have high-security concerns but don’t want to invest in a faster (but costlier) dedicated server.
- Dedicated Hosting: Dedicated hosting offers you an entire server for yourself, thereby making it faster, more secure…and costlier. It is the ideal solution for larger businesses and high-traffic websites because it allows for maximum customization, configuration, installation and flexibility.
- Cloud Hosting: Cloud hosting allows multiple virtual servers (clouds) to work together to host a website or a group of websites. It offers unlimited ability to handle sudden traffic spikes. A cloud-hosted website is not limited to a single server, and the resources allocated to it can shrink or expand dynamically, depending on how much traffic you get. It’s a great option for large websites, including e-commerce websites, newsletters and blogs.
Steps to install WordPress on Hostgator
Now, you have both Domain name and a web hosting plan. Next step is to setup or install WordPress CMS tool.
To install WordPress, follow the steps below
Step 01: Login your hostgator account and open CPanel
Step 02: Click on WordPress or Softaculous
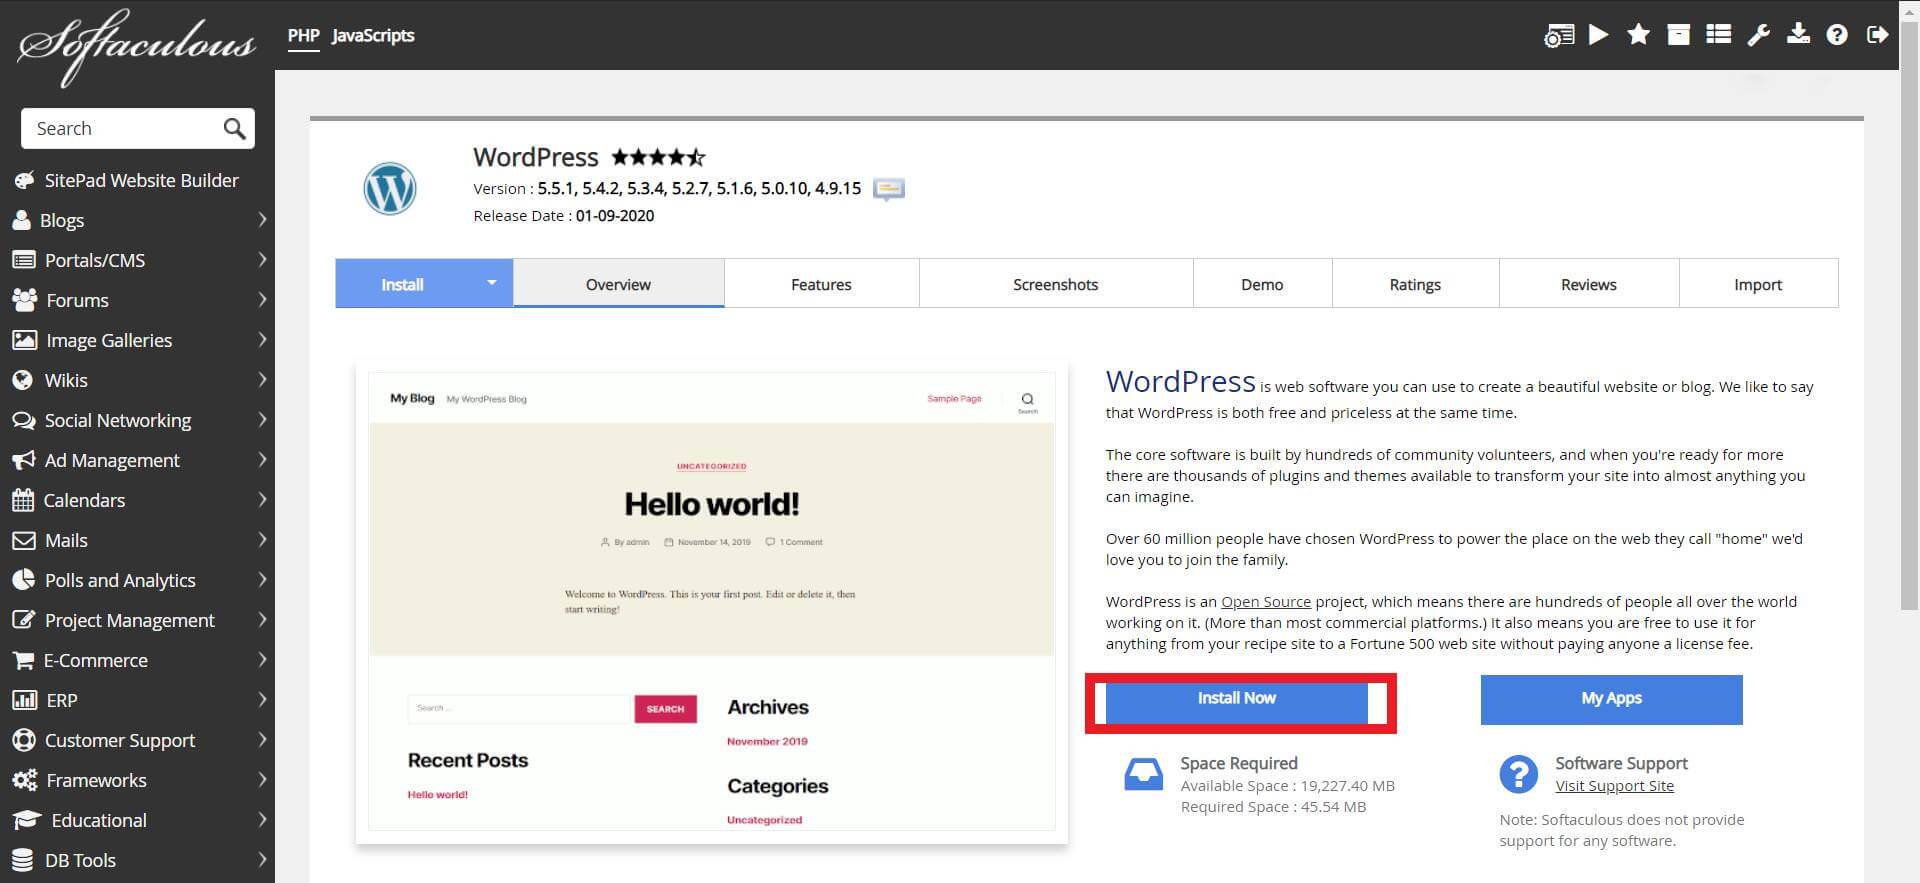
Step 03: Select WordPress and Click on Install Now
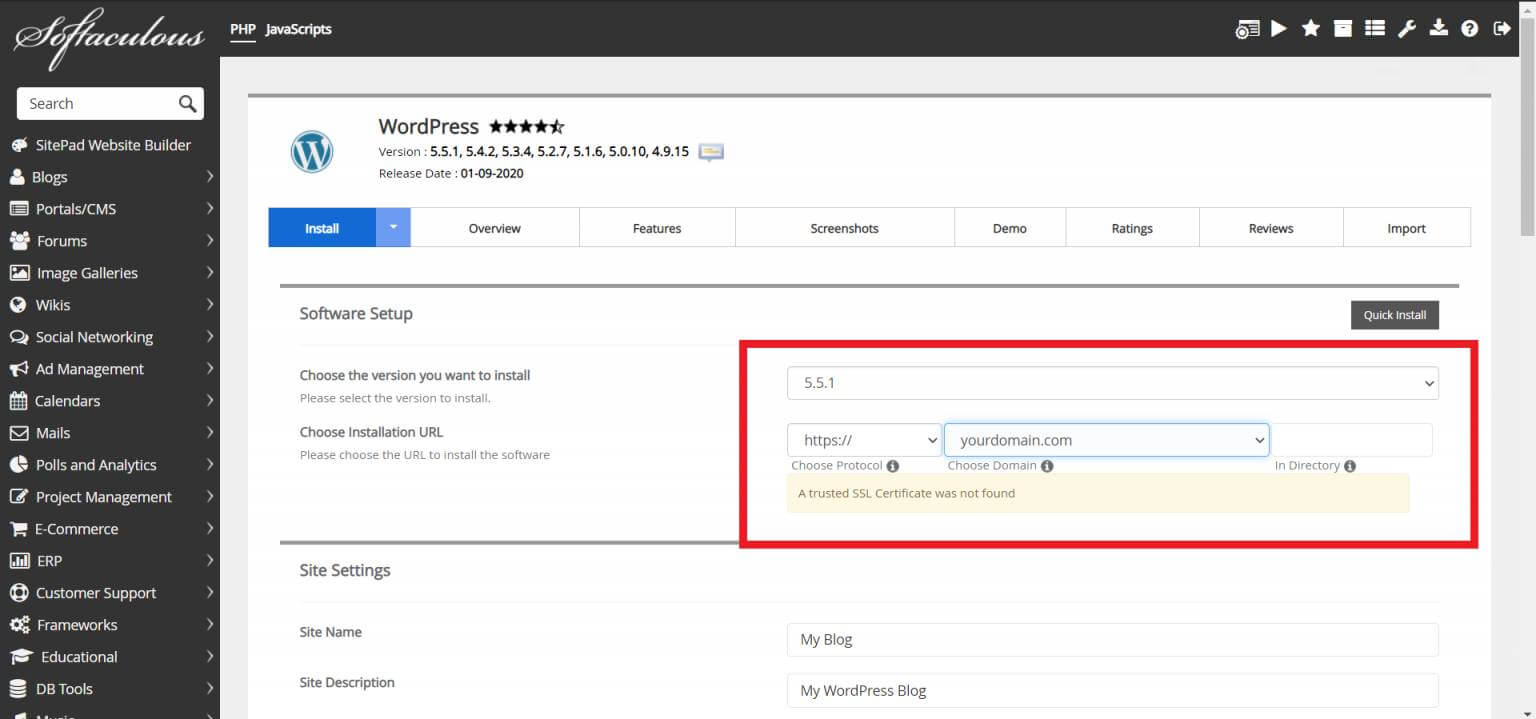
Step 04: Select or Fill the details like Version of your WordPress, Choose Protocol and Choose Domain. If you want to install WordPress on root domain, keep the directory field empty.
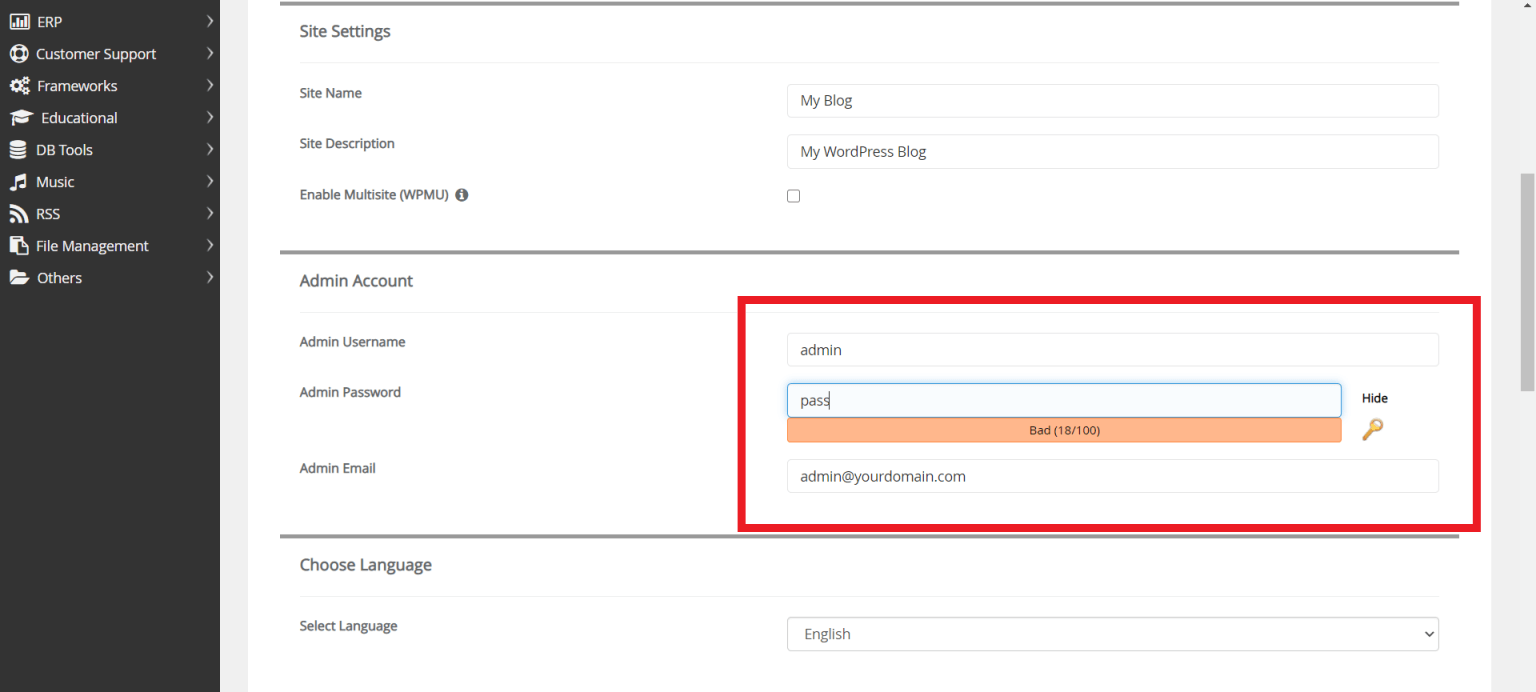
Step 05: Fill the details like, Admin Username, Admin Password and Admin Email. These details are required to login to the admin panel of your website or WordPress Dashboard.
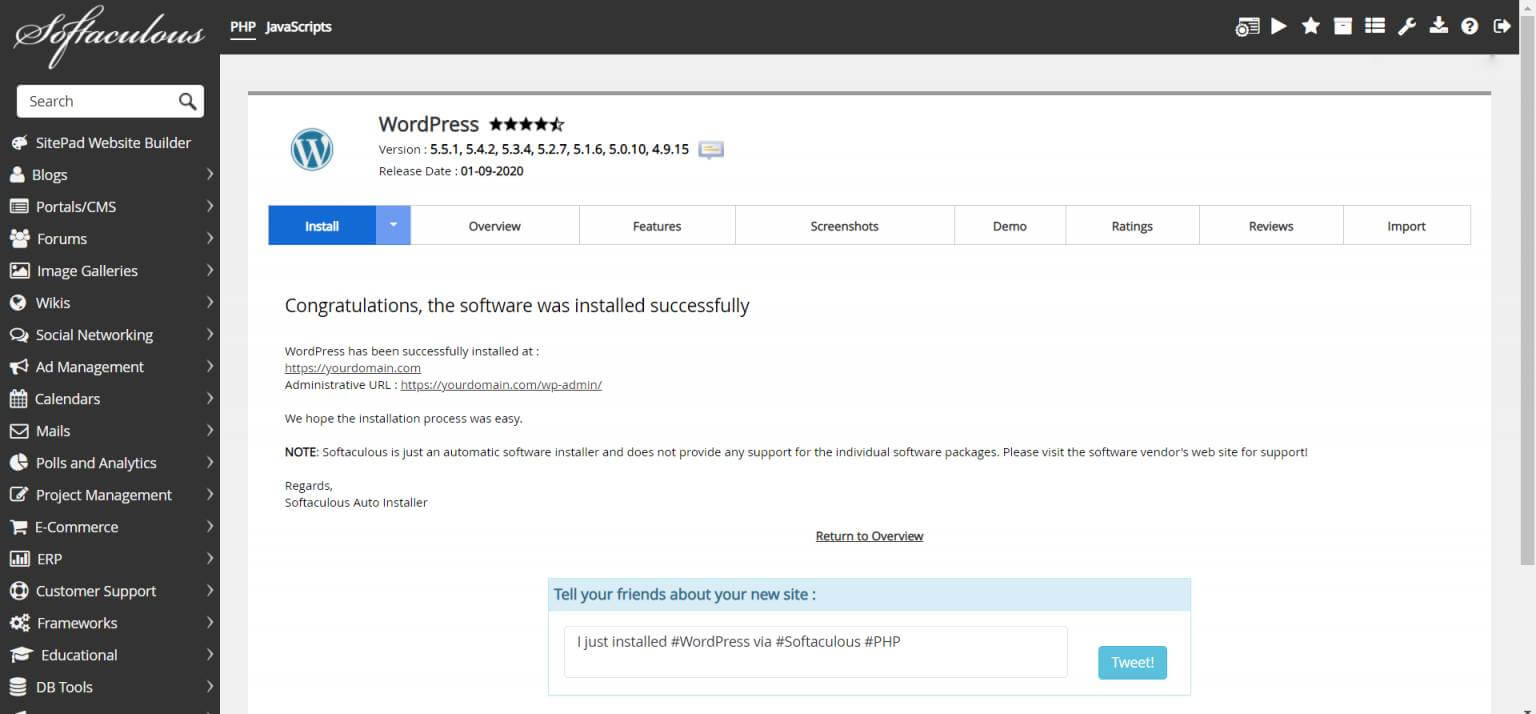
Step 06: Click on the Install and wait for 1-2 minutes. Congratulation, Your website is ready
If you still have any doubt, feel free to ask. Thanks for reading
This post has been included as an entry into a giveaway/sweepstakes.