Snapchat remains one of the most popular multimedia messaging apps on the planet. And you can even make your own Snapchat filter.
So, in this article, we will guide you through step by step, so that you can create your own custom Snapchat filter from scratch.
Although, with practice, it’s a skill within everyone’s reach, being able to operate 3D or 2D element creation programs is essential, since that is what we’ll be using to create the materials with which we’ll later build the filter in Lens Studio.
Steps to make your own Snapchat Filter from Scratch
Step 1. Download Lens Studio
The first step involves downloading Lens Studio, which you can do from your computer. It is compatible with both Windows and Mac computers, and will run on any semi-modern system.
Lens Studio allows you to create, publish and share Lenses with millions of Snapchatters across the globe.
Lens Studio is free software that empowers anyone to become a Lens Creator! Check out the official Lens Studio website to get started.
According to the Snapchat team, Lens Studio is similar to the program used by their AR teams to create lenses. That means you are getting similar functionality, but with an easier to manage interface.
With Lens Studio, you can create your own custom Lenses that can be used in both Snap Camera and Snapchat!
Step 2. Choose Templates Page
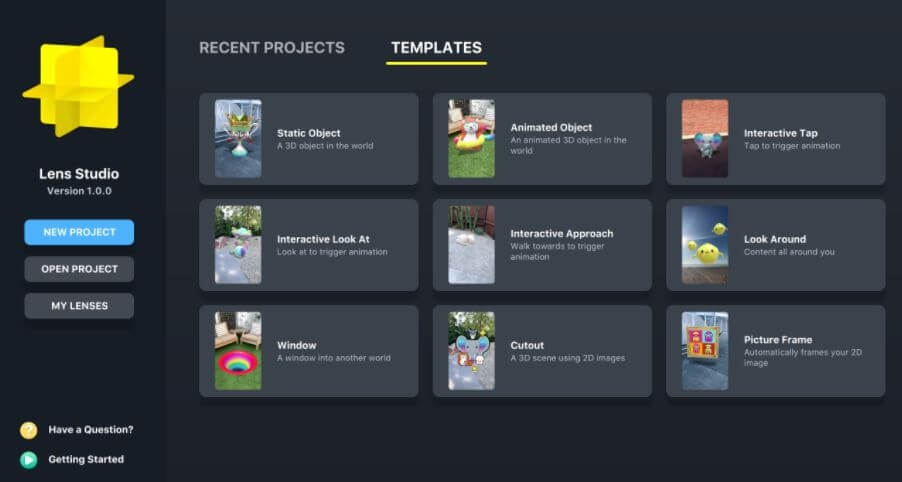
It is normal to feel a little overwhelmed the first time you try and use this program. But that is why the templates page is so great. You can select from templates depending on the type of lens that you are hoping to create. You can just use a template, or you can incorporate your own ideas to customize the template.
There is also a Lens Studio Overview guide that you can access online, which will help you get acquainted with the program’s various features and quirks.
Step 3. Use Studio Panels
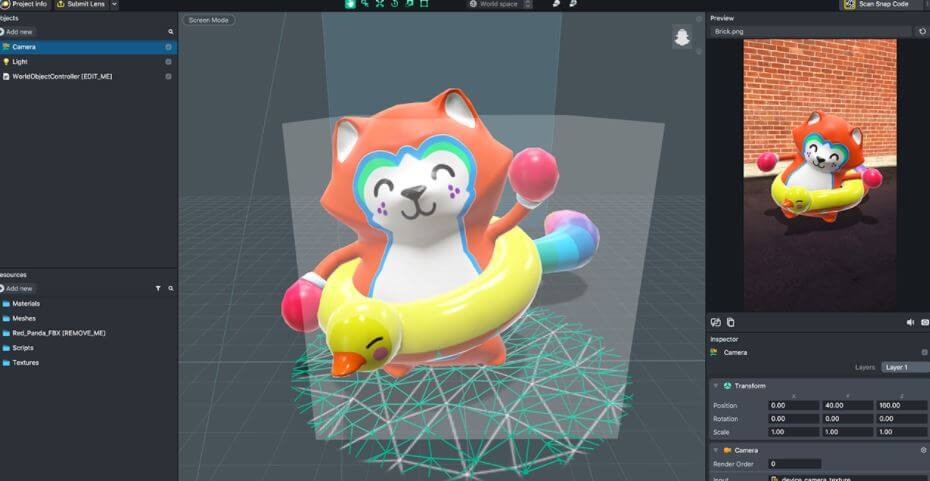
Are you ready to create your own custom Snapchat lens? It is time to head over to Studio Panels on the application. This is the area where you can add your own 2D or 3D objects, and you can visualize how they would look as a Snapchat filter. You can add, remove, resize and drag objects to specific areas of the screen.
There are other tools accessible from the Resources panel. You can use these tools to ensure that your Snapchat lens is exactly as you want.
Lens Studio is made up of a group of modular panels. Any panel can be moved and scaled to better suit your needs. Below is a brief summary of each panel:
- Scene: Visualize your Lens scene in 3D space. The
Sceneis where you’re able to manipulate the position, scale and rotation of 3D objects. TheScenepanel will automatically transitions to the 2D Scene mode when working with Face Effects, Screen Image and Post Effect. - Objects: Lists all objects that make up your current scene. Objects can be parented to one another through a simple drag and drop. Note that 2D objects (e.g.
Screen Image) are rendered in the order they are arranged in theObjectspanel (i.e. the bottommost objects are rendered in front of topmost objects) - Inspector: Edit any parameters on any selected object. Additionally, you’re able to add components to the selected object. Components are functional building blocks for the objects you create
- Resources: Import new assets into your project and manage existing assets. For more information on managing resources, follow the Importing and Updating Resources guide
- Logger: Shows debug messages outputted by script via the
print( message )function alongside any warning or error messages - Preview: Presents your Lens experiences running in real-time. Lens Studio comes with a series of preview videos which include tracking data. With these videos, you’ll be able to preview what your Lenses would look like in the world or applied to a face
- Scene Config: Controls live and capture render target settings
Additionally, at any time, pressing the Pair Your Device button allows you to pair your Snapchat application to Lens Studio. When paired, you’re able to see your Lenses in real-time from within Snapchat.
Step 4. Preview the Snapchat Lens You Create
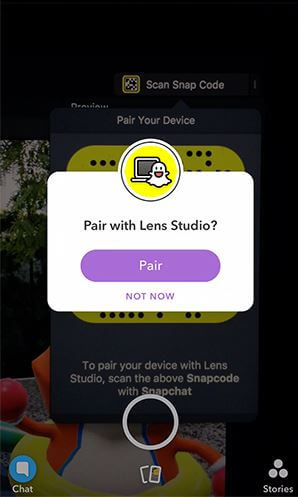
The great thing about this application is that you can preview the lens before you send it out to your phone. When you are satisfied with the image on the preview, you can pair your phone with the application, and you will be able to send that Snapchat lens onto your phone through your Snapcode. It is that simple!